
It’s exciting…it’s fun…
But, it can also seem overwhelming, daunting, and terrifying.
A trip to Walt Disney World certainly can be very expensive (but doesn’t HAVE to be – more about that in a later post), and booking one can be nerve-wracking for first-timers. What follows is some information that should help ease the nerves of the uninitiated when planning and booking your first family Disney World vacation.
First off, take comfort in knowing that you can price out your entire trip on the Disney World website before you even start saving for it at http://disneyworld.disney.go.com.

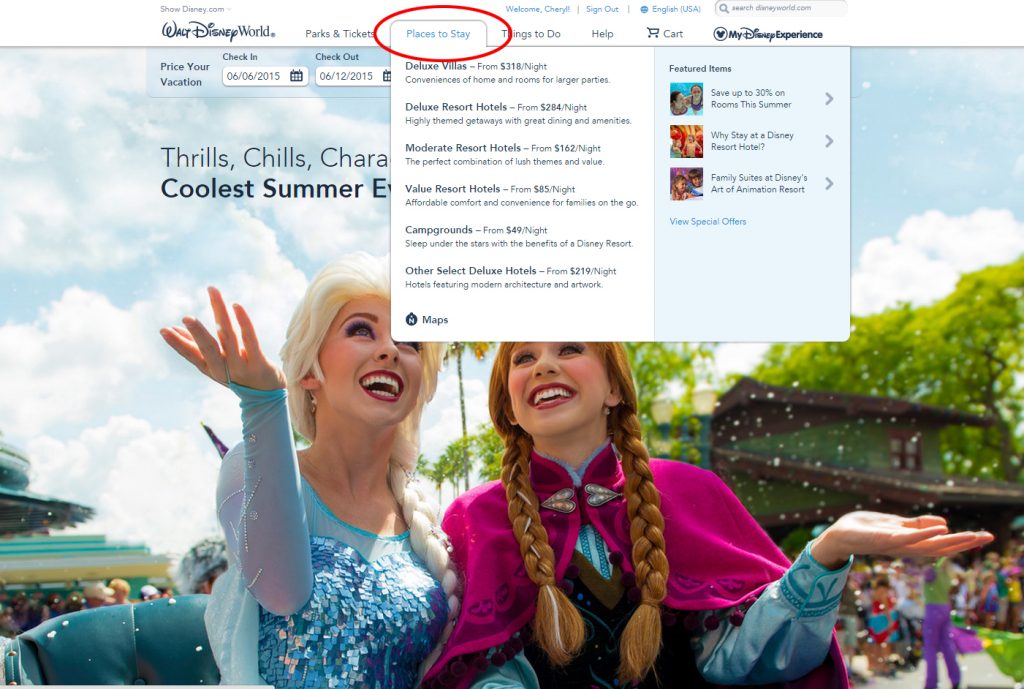
The first thing to do is to pick a place to stay. If you have no idea of where you want to stay or how much you want to spend, just click on “Places to Stay” (circled in red below), or you can choose one of the different levels of resorts (Deluxe Villas, Deluxe Resort Hotels, Moderate Resort Hotels, Value Resort Hotels, etc.).
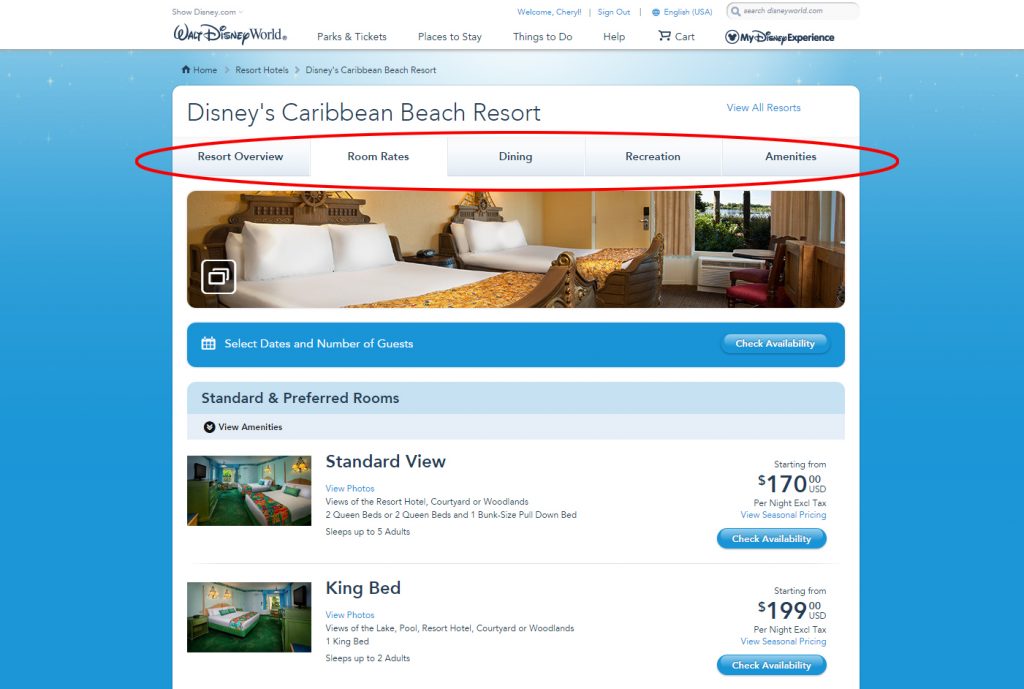
Once you are in the list of Resorts, you can sort by price, name, location or Disney’s Picks. Take a look at the resorts and see which would fit the needs of your family the most. Don’t forget that each resort has different offerings as far as dining, shopping, and recreation, so check out each resort page and look at the top of the page for tabs pointing to this information (circled in red below). Links to pictures of the Resort Grounds and Rooms can be found on the Room Rates page.
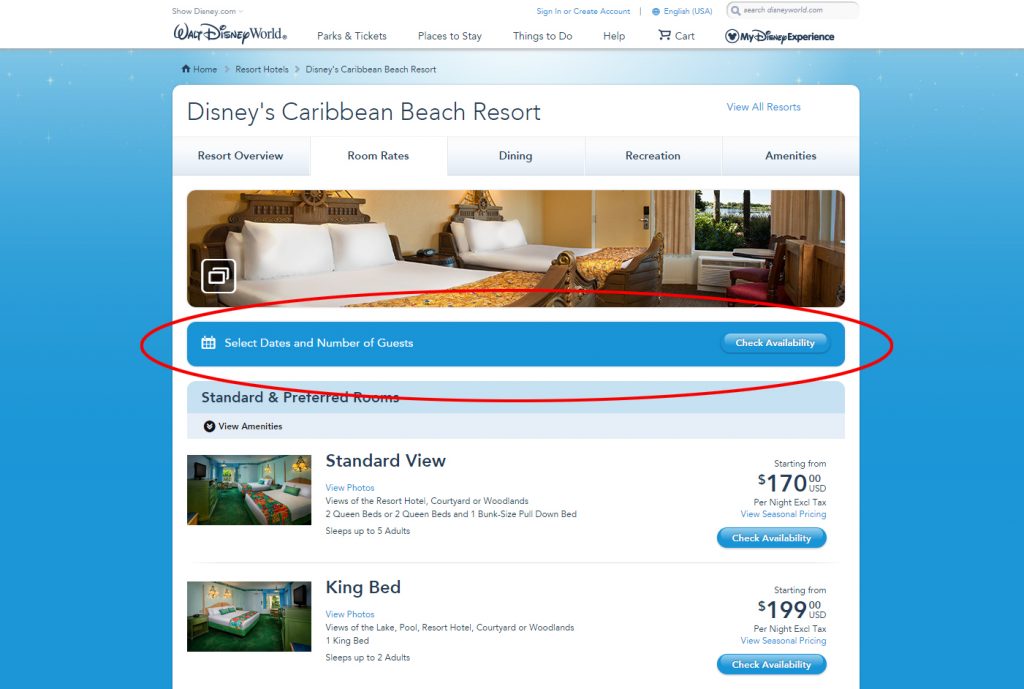
Once you decide which resort you’d like to price out, click on “Check Availability” (circled in red below).
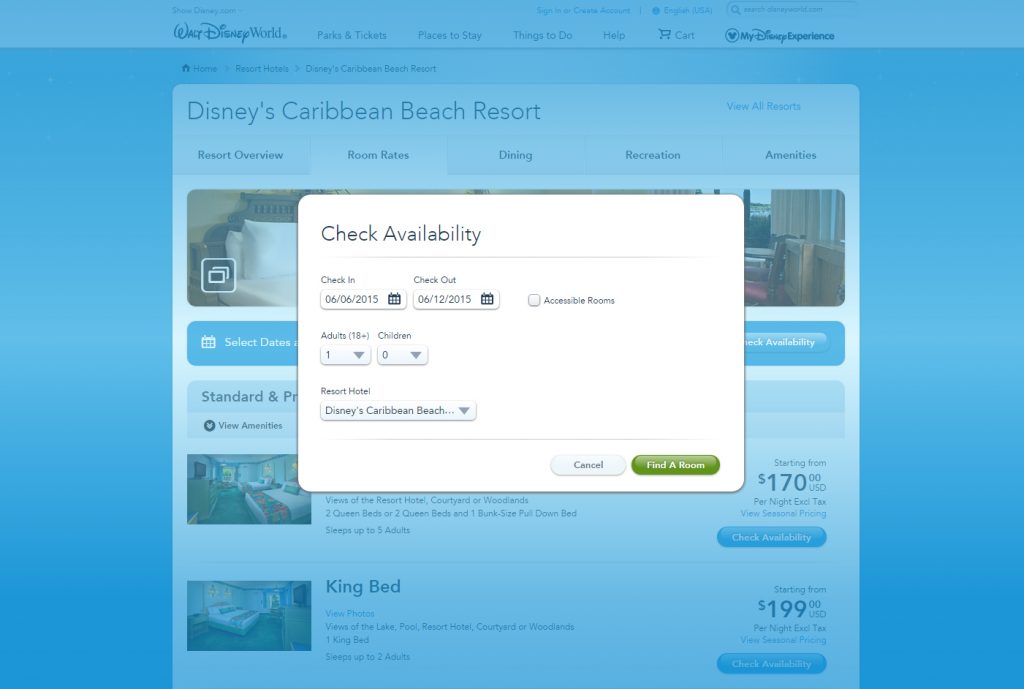
A small window will open up allowing you to choose dates and how many will be traveling. Don’t worry if you happen to get a result that says nothing is available…just change the dates of your travel and something will come up (keep in mind, there are certain seasons that are busier than others, and the closer you book to your travel date, the less availability there will be).
Once you fill in your information and find available rooms, make your selection. The next screen will allow you to add park tickets. By default, the selection is on the number of tickets matching the number of days in your trip. If you’d like to take a day away from the parks, just modify the selection. Immediately below the number of tickets, you will see ticket options. The choices are Park Hopper, Water Parks Fun & More, and Park Hopper and Water Parks Fun & More. The Park Hopper option lets you enter any parks you want on the same day. Without park hopper, you are restricted to one park per day. Water Parks Fun & More gives you entrance to Blizzard Beach and Typhoon Lagoon for the same number of days you are purchasing base tickets for. The Park Hopper and Water Parks Fun & More option gives you the freedom to literally go wherever you want for the length of your stay – you could go to all 4 parks and both water parks on one day if you so desired.
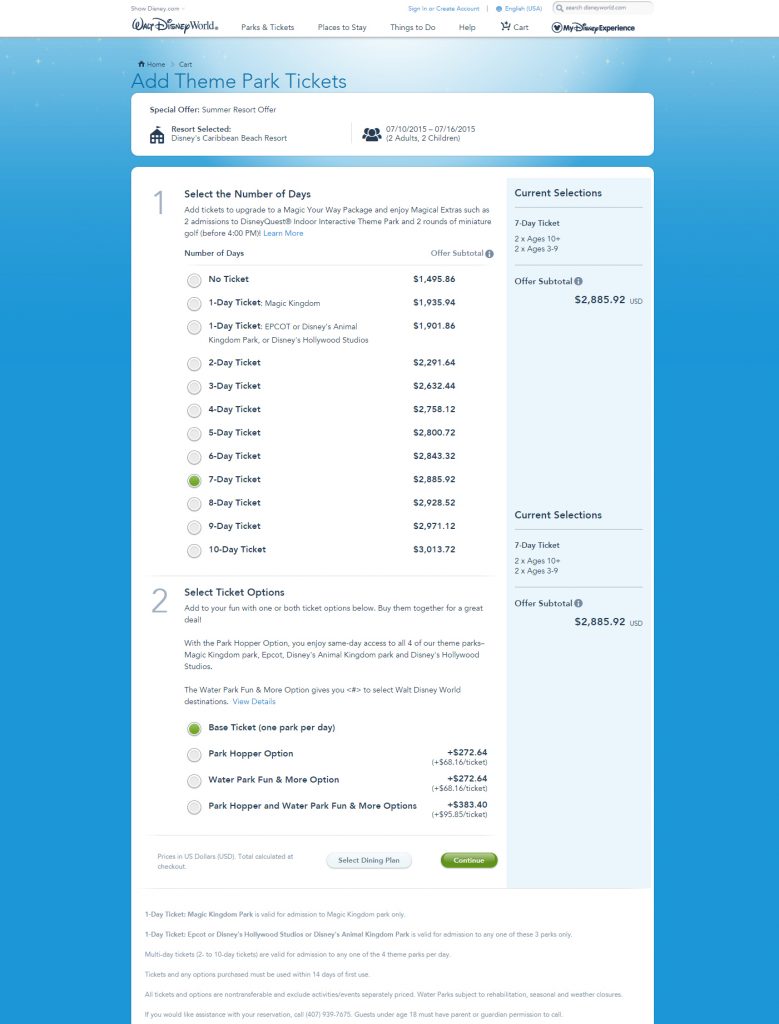
You will notice when you go to click “Continue” near the bottom of the page that there is a grey “Select Dining Plan” button. A dining plan is completely optional, and there are three levels – Quick Service, the Disney Dining Plan, and Deluxe. Personally, we love having a dining plan, but it isn’t for everyone (at least some character meals are included on all but the Quick-Service plan, and they can get expensive). You may either click on the “Select Dining Plan” button to choose a plan or the “Continue” button to view your cart and the other available options.
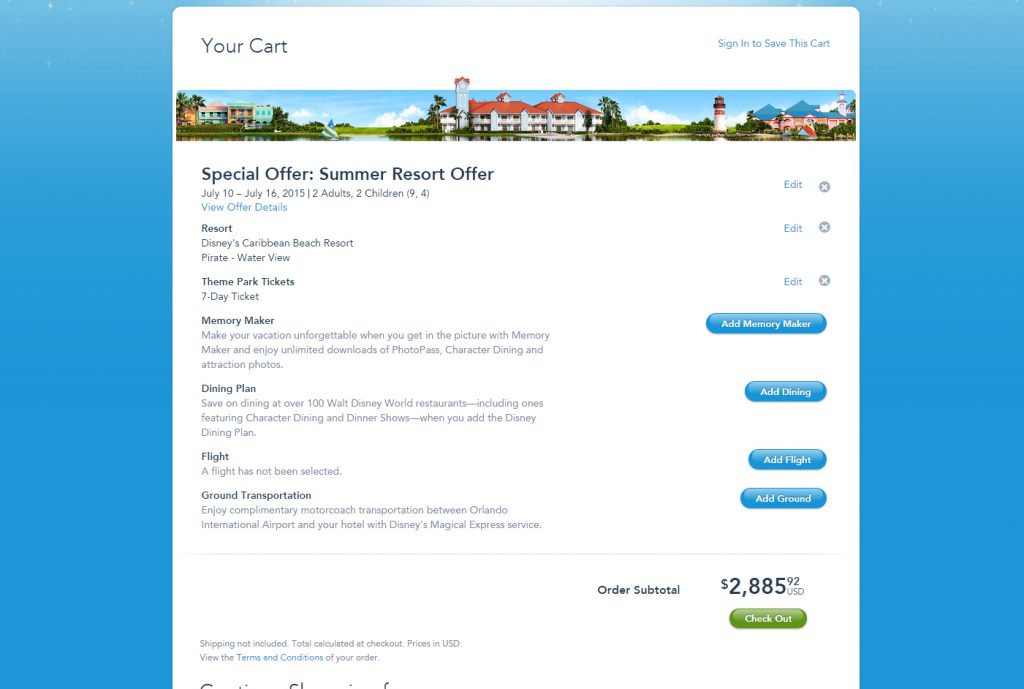
Once in the cart, you will see the ability to add a Dining Plan (if you haven’t already), Memory Maker (see post here), find a Flight, and add Ground Transportation. Don’t be afraid to book flights through Disney. Contrary to popular belief, Disney will give you the exact same prices for flights as you would be able to book yourself on the airline’s website, and they work with most airlines.
On the Ground Transportation page, you are given three options – Disney’s Magical Express Service, a rental car, or Airport Transfer Services. My family prefers staying on-property for the feeling of complete immersion in the Disney magic, so we never rent a car (you are given many options to choose from though). Airport Transfer Services are Limo services. The Magical Express is just that – magical! It’s free, and here’s how it works…
Your plane lands. The first thing you THINK you need to do is go and gather your luggage…but then you remember that you asked for Magical Express service! You will be sent yellow luggage tickets prior to your trip in addition to the ones the airline gives you. Instead of heading for the baggage carousel, you can go directly to the Magical Express area of Orlando International Airport (there are signs everywhere, so don’t worry!). You may need to wait for a few minutes, but when the bus arrives, you can just get on board (after showing your identification), and off to your Resort you go! The Magical Express will get your luggage for you and bring it to your resort. Now, keep in mind that there can be delays – both because of the airport and because of the Magical Express being busy, so if you choose to have them get your luggage for you at the airport, make sure you pack your carry-on accordingly, just in case you don’t get your bags until the next morning. My family chooses to avoid any possible lags and just bring our bags to the Magical Express ourselves.
![]()
Once you have made all your selections and you see the total price of your vacation, you are still able to make changes. You can fiddle with your length of stay, whether you choose a dining plan and which one you choose, different resorts, different numbers of base tickets and ticket options…play to your heart’s content and until you have the trip you want ready to book.
Now, you have some more choices to make. If you aren’t sure whether you’d like to pull the trigger on your trip yet, fear not – just sign in (or register) on the site, and your cart will be saved for you (but not indefinitely). When you are ready to book, you will need to put $200 down and pay off the remainder of your balance 45 days before your travel date. Another nice thing about Disney is that you can make ANY changes to your trip until your 45 days out date – resort, tickets, dining…they don’t care. As long as you are before your 45 days out mark, there is no charge for changes or cancellation.
When you book, you can either go through check-out on the website or do what I do – call Disney and have them book the trip, exactly the way you planned it out on the website. There’s a couple of reasons I choose to book through Disney over the phone…1) I LOVE talking to the Cast Members that work for Disney!!! Not only are the fun, upbeat people, but they are full of amazing tips, tricks, and advice. 2) If anything gets messed up, I can call them back and ask them to fix it. 3) You can add travel insurance through Disney over the phone.
So here are the main things to remember…
- The pay-off day is 45 days before your departure date.
- Disney’s cancellation policy is that there is no charge up to your 45 day mark, but after that there will be a fee.
- You can make dining reservations 180 days before your departure date even if you haven’t booked your trip yet – you just have to have an account on the website. Once you book your trip with the same e-mail address, they will be listed with your vacation.
- Dining reservations must be cancelled 24 hours before the time of the reservation or you will be charged $10 per person.
- FastPasses for rides and attractions can be made 60 days from your travel date if you are staying in a Disney resort, 30 days if you are staying off-property.
That’s all there is to it!
At least until you see this…
Keep checking back for more posts on planning and booking your dream Disney vacation!